Creating UDT Definition
So far we have only dealt with simple tags. Additionally, In Ignition, you can create complex tags or user defined types (UDTs). These types can model UDTs in certain PLCs (such as a ControlLogix) or can be completely new.
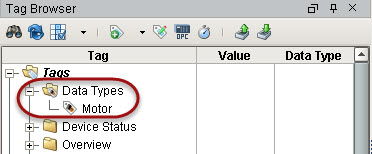
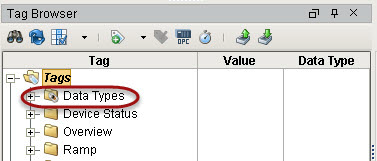
You create the UDTs in a special folder in the Tags Browser called Data Types.
UDTs (User Defined Types) can be created in the following different ways:
-
from browsing OPC servers via OPC Browser
-
by converting them from existing tags
-
by manually creating them
If your PLC supports UDTs, the easiest way to create a type is from OPC.
To create the UDT from OPC Browser
In the example here, we will use a ControlLogix which supports UDTs. We will use the second method from above that is, creating the UDT from OPC. In our ControlLogix PLC, lets say we already have a motor UDT setup and now we will create the UDT in Ignition.
-
From Tags Browser, click the OPC Browse icon.
-
Under the CLX folder, go to the Global folder and find the M1 folder.
M1 represents a motor which has four tags: AMPS, HOA, RUN_CMD, and STATUS. -
Drag the M1 folder to the Data Types folder in Tags Browser.
A window prompts you asking if you want to create a type or tags.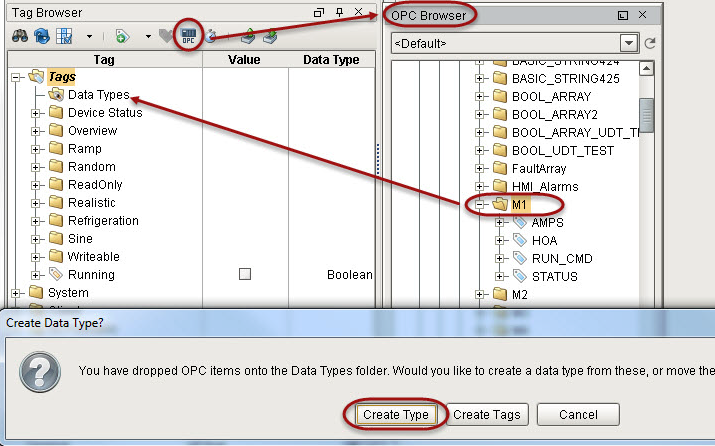
-
Click on Create Type.
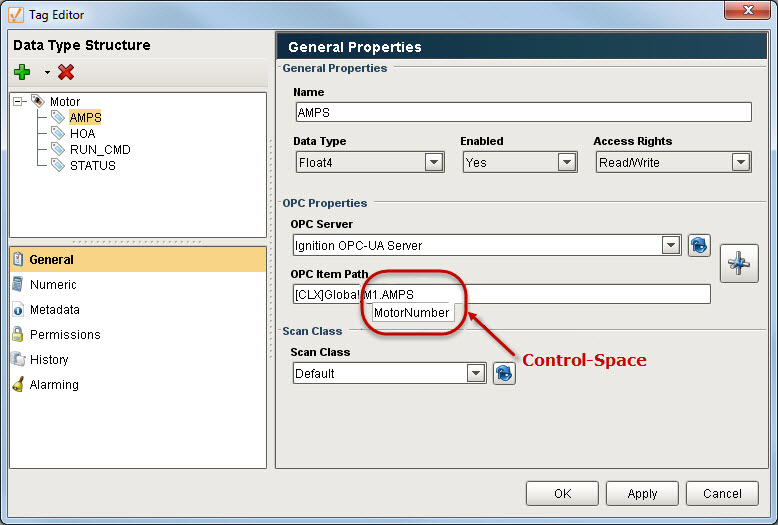
The Tag Editor window is displayed. Notice all four tags AMPS, HOA, RUN_CMD, and STATUS are automatically part of the UDT. -
In the Tag Editor, change the name from M1 to Motor to make the type name more of a generic name.
-
Right now each tag is pointing to a specific address in the PLC, select the AMPS tag to see that it is pointing to M1 in the PLC.

Because we are creating a UDT we don't want to point to one specific set of tags. We want each instance of the UDT to reference a different set of tags. To do that, we need to add a parameter to the UDT.
Parameters are custom properties on data types. You can use the parameters inside the type or instance definition to create parameterized data templates.
For example, if a data type consists of three OPC tags that only differ by a number in the path, you can use a parameter for the “base address”, allowing instances to be created with only one setting. -
In the Tag Editor, select the Motor data type and add a new parameter by
clicking the green + button and setting the following:
Name: MotorNumber
Data Type: String

-
Click OK.
Now for each tag, we can substitute the motor number with the MotorNumber parameter. -
Open the Tag Editor again, select the AMPS tag. In the OPC Item Path, click on M1 and press Ctrl-Space to bring up the list of parameters, click MotorNumber to replace 1 with {MotorNumber}.
-
Do the same for the HOA tag.
The OPC Item Path will then show:
[CLX]Global.M{MotorNumber}.HOA
-
Click OK to save the UDT.
You will see the Motor UDT in the Data Types folder.